ansible localhost -m package -a "name=scap-security-guide state=present" -bExercise Description
In this exercise, we are going to use Red Hat Ansible Tower to run a Operating System Protection Profile (OSPP) for RHEL 8.x for our environment
Step 1: Generate a security profile using OpenSCAP.
In your Web Console Terminal window (if you closed it, see the SETUP step, in your workbook), install OpenScap on the Tower node:
Next, setup a local projects directory to stage a remediation playbook
ansible localhost -m file -a "path=/var/lib/awx/projects/openscap-ospp state=directory mode=0755 owner=awx group=awx" -bUse OpenSCAP to read a hardening profile via Extensible Configuration Checklist Description Format (XCCDF) and generate an Ansible remediation playbook.
sudo -u awx oscap xccdf generate fix --fix-type ansible --profile xccdf_org.ssgproject.content_profile_ospp \
     --output /var/lib/awx/projects/openscap-ospp/ospp-rhel8.yml \
     --fetch-remote-resources /usr/share/xml/scap/ssg/content/ssg-rhel8-ds.xml
Step 2: Select Projects
Click the Projects tab, in the Ansible Tower UI. ![]()
Step 3: Click Add
Next, Select ![]()
Step 4: Complete the Project form
Complete the project form, using the following entries:
NAME |
Ansible RHEL8 OSPP Project |
DESCRIPTION |
RHEL8 OSPP Playbook |
ORGANIZATION |
Default |
SCM TYPE |
Manual |
PROJECT BASE PATH |
/var/lib/awx/projects |
PLAYBOOK DIRECTORY |
openscap-ospp |

Step 5: Save
Select SAVE ![]()
Step 6: Select Template tab
In your Tower window, click TEMPLATES
Step 7: Add the job template
Click ADD ![]() , and select
, and select JOB TEMPLATE
Step 8: Complete the job Template form
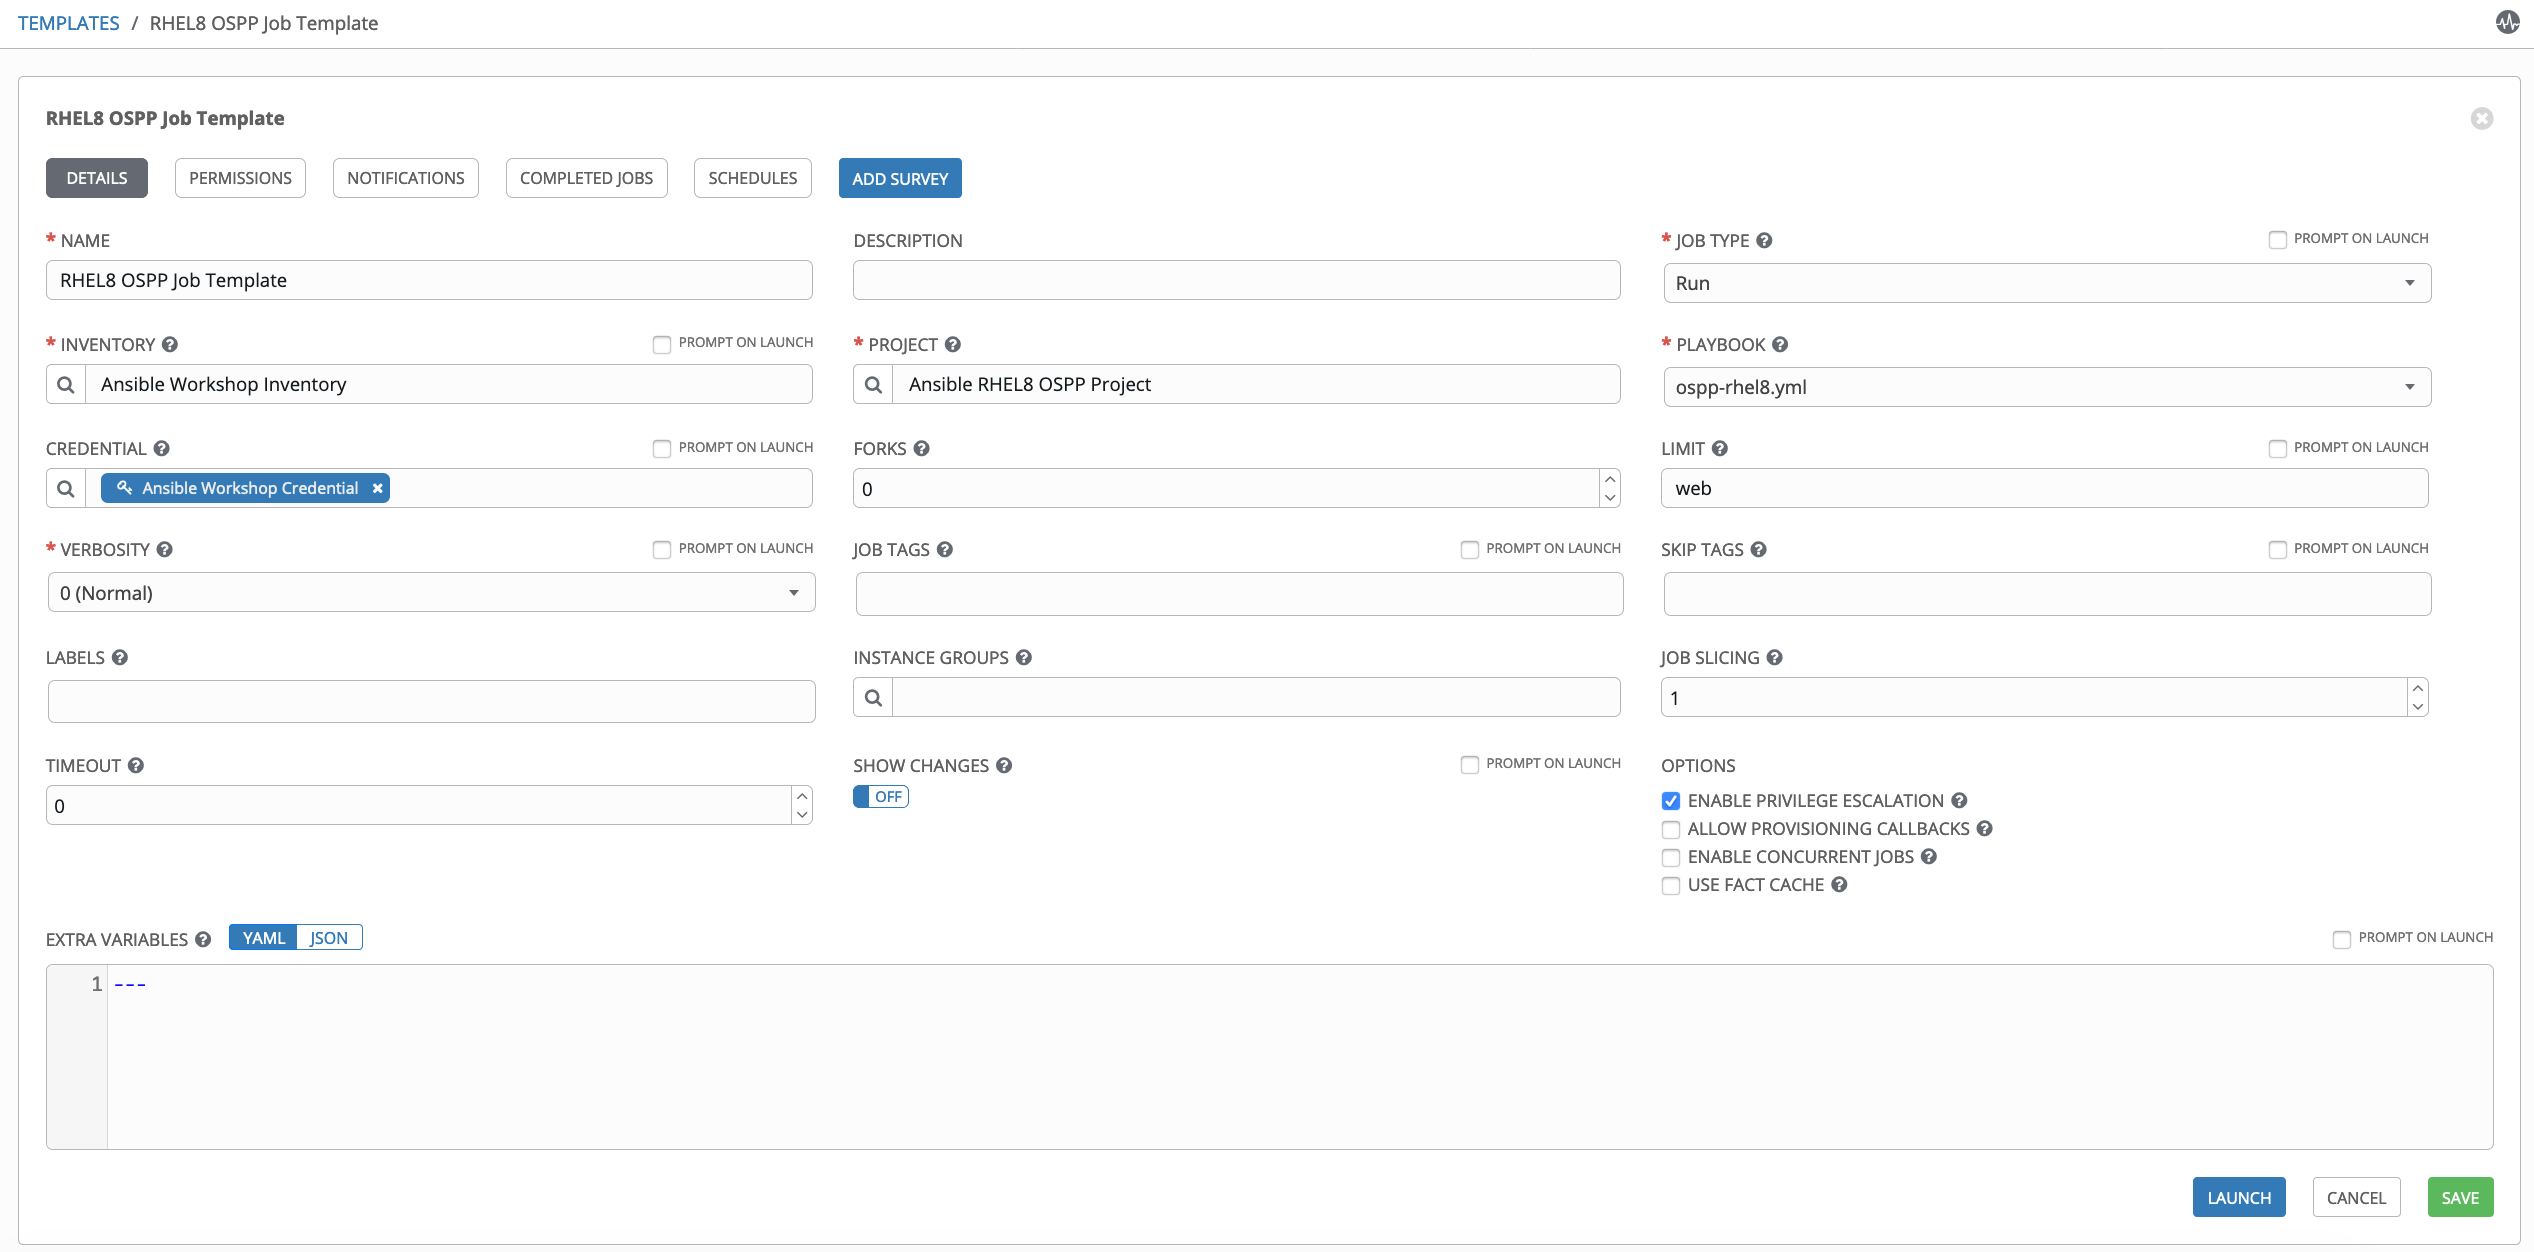
Complete the form using the following values. Note that the PLAYBOOK field should offer ospp-rhel8.yml as an option, when clicked.
NAME |
RHEL8 OSPP Job Template |
JOB TYPE |
Run |
INVENTORY |
Ansible Workshop Inventory |
PROJECT |
Ansible RHEL8 OSPP Project |
PLAYBOOK |
ospp-rhel8.yml |
MACHINE CREDENTIAL |
Ansible Workshop Credential |
LIMIT |
web |
VERBOSITY |
0(Normal) |
OPTIONS |
|

Step 9: Save the template and run it
Click SAVE  , to store your new template, and we are ready to run it.
Click the rocketship icon ![]() next to the
next to the RHEL8 OSPP Job Template entry, to launch the job.
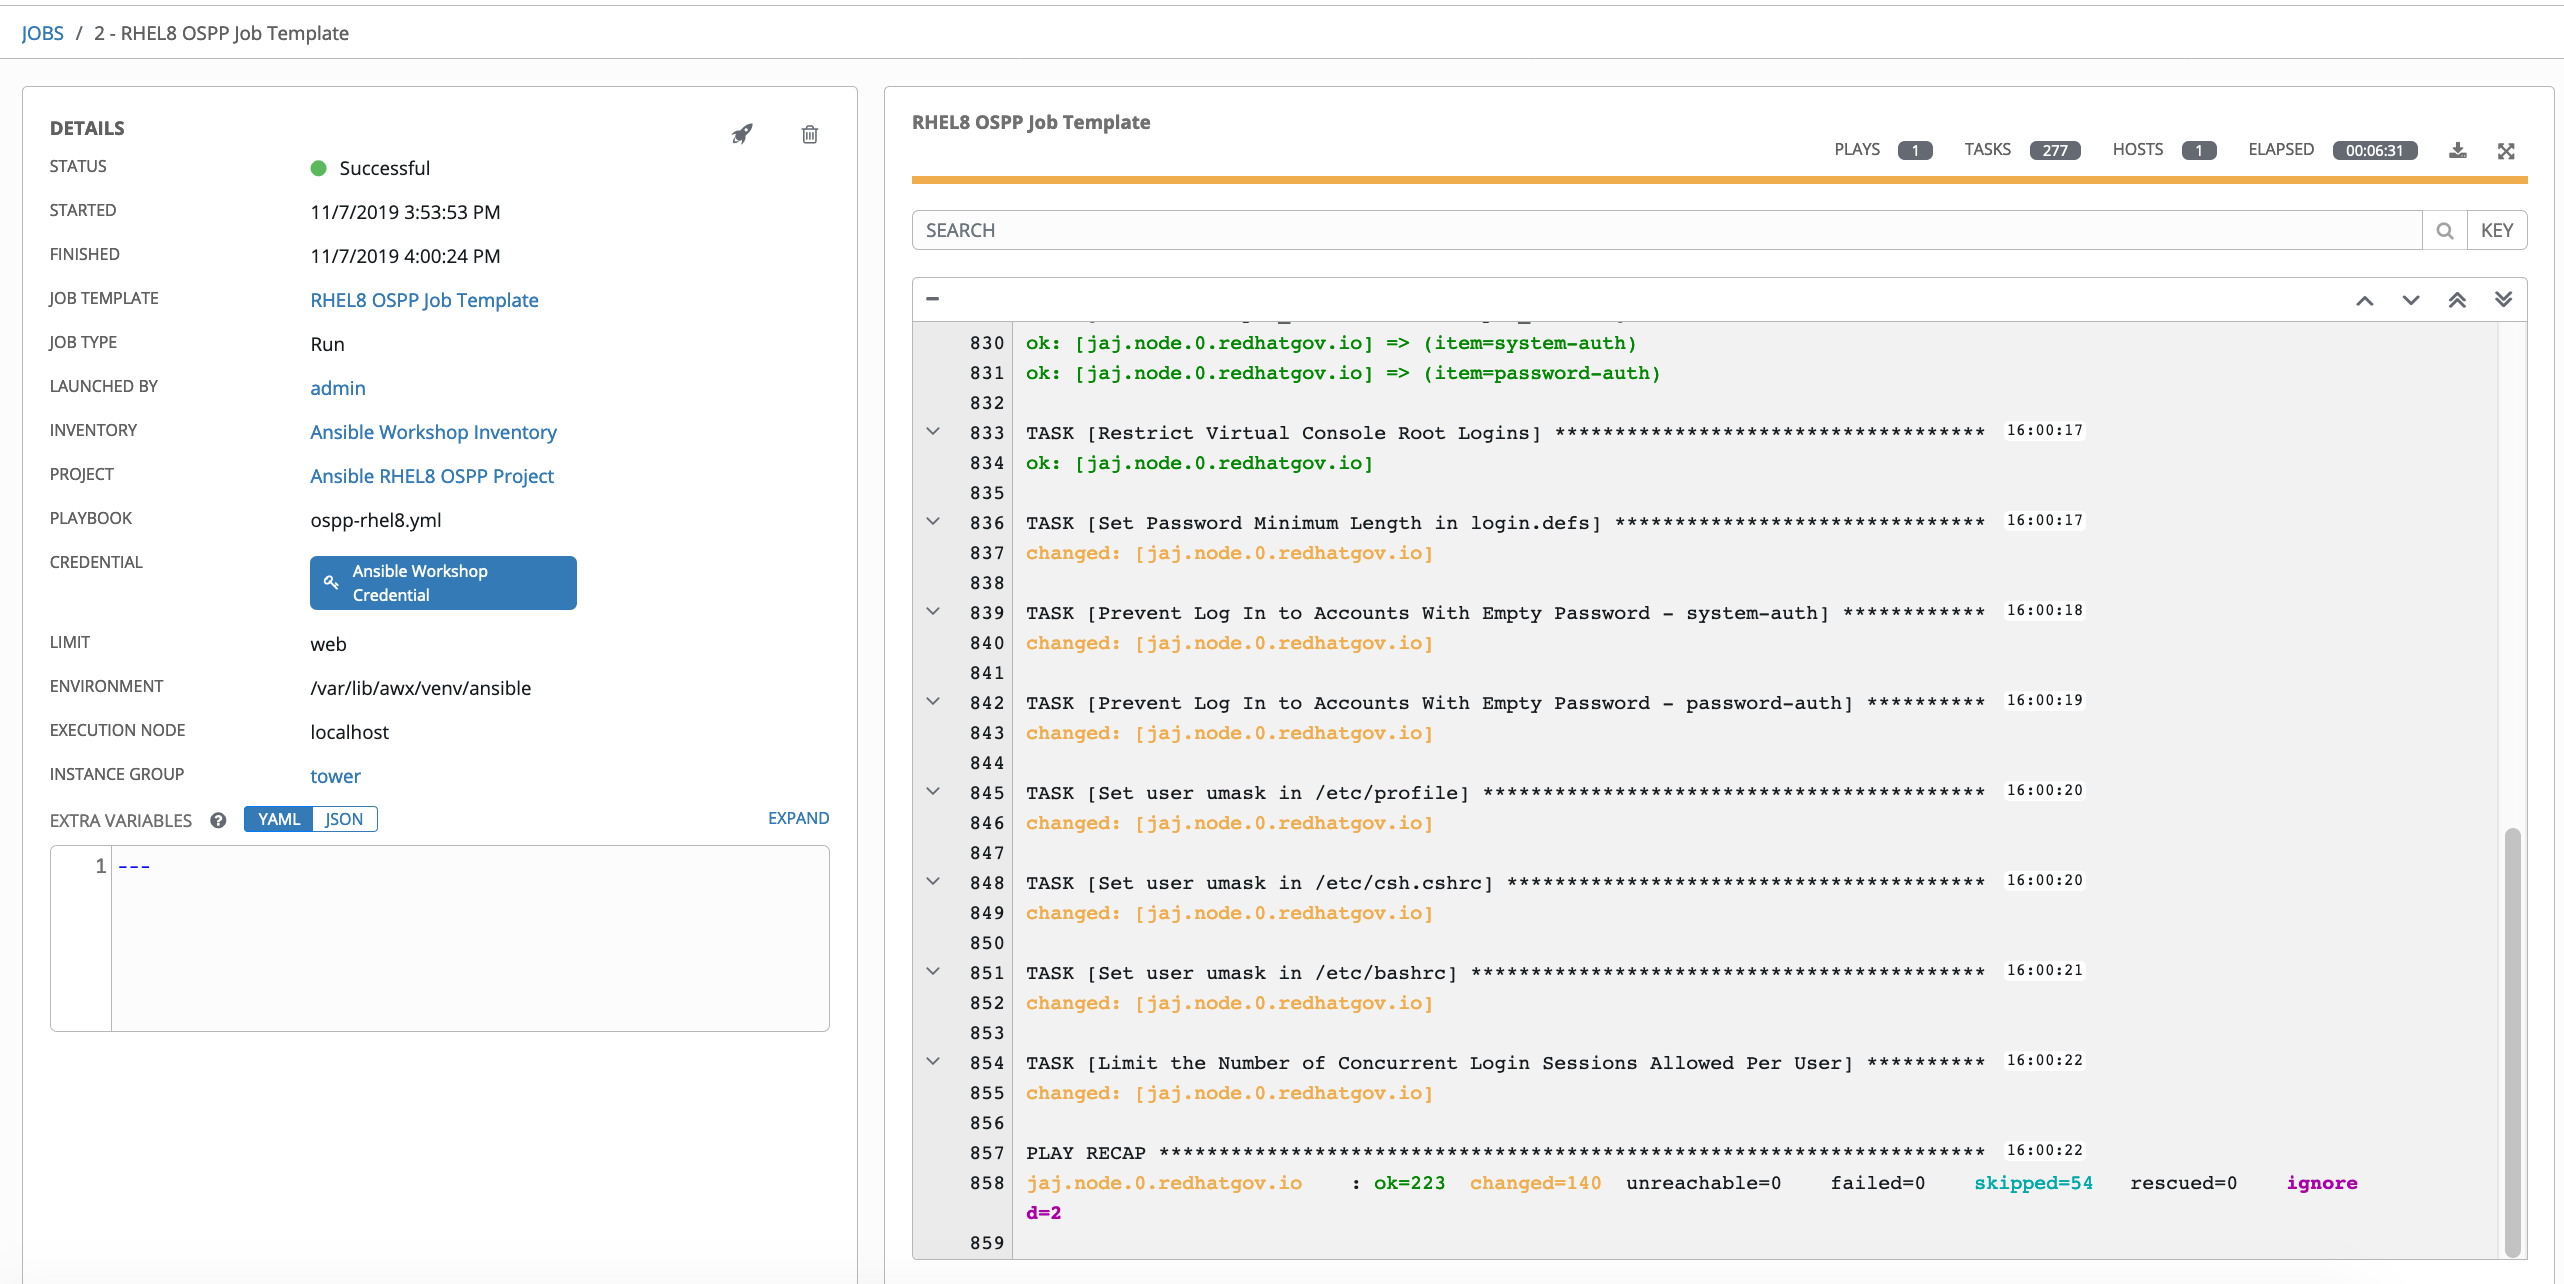
View what the job looks like as it is executing, as well as what the SCAP results look like, when uploaded to your second node, in the panel, below.
Workshop Details
| Domain |

|
|
| Workshop | ||
| Student ID |
