-
Enable Privilege Escalation
Exercise Description
This exercise will walk you through the steps required to create a job template and run it.
A job template is a definition and set of parameters for running an Ansible job. In other words, a template combines an Ansible project playbook and the settings required to launch it, into one package. Templates save setup time, for jobs that are launched repetitively. Once the template is set, it can be edited for future jobs, with different settings.
Templates also drive uniformity, by running templates exactly the same way every time. And, because we’re using templates, production responsibilities can be delegated to less experienced production personnel.
Creating a Job Template
Step 1: Navigate to the Templates tab
Select TEMPLATES ![]()
Step 2: Create a new template
Click ![]() , and select JOB TEMPLATE
, and select JOB TEMPLATE 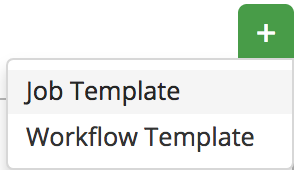
Step 3: Complete the job Template form
Complete the template form, by entering the following values:
NAME |
Apache Basic Job Template |
DESCRIPTION |
Template for the apache-basic-playbook |
JOB TYPE |
Run |
INVENTORY |
Ansible Workshop Inventory |
PROJECT |
Ansible Workshop Project |
PLAYBOOK |
examples/apache-basic-playbook/site.yml |
MACHINE CREDENTIAL |
Ansible Workshop Credential |
LIMIT |
web |
OPTIONS |
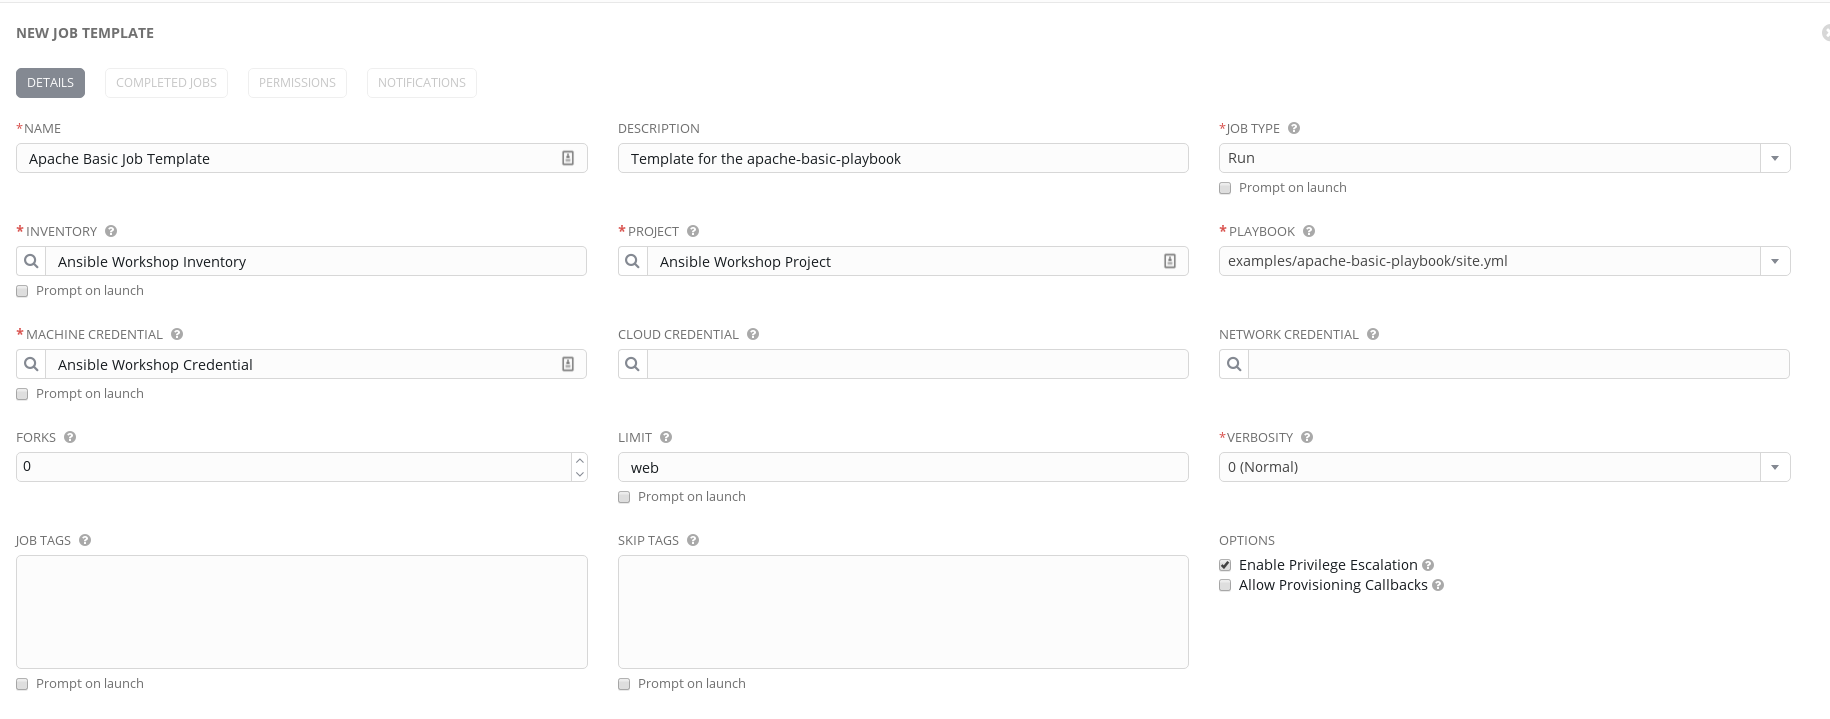
Step 4: Save
Click SAVE  and then select ADD SURVEY
Step 5: Complete survey
Job surveys provide extra playbook variables and present them in a user-friendly way. They also enable validation of the input you provide.
Complete the survey form with following values.
PROMPT |
Please enter a test message for your new website |
DESCRIPTION |
Website test message prompt |
ANSWER VARIABLE NAME |
apache_test_message |
ANSWER TYPE |
Text |
MINIMUM/MAXIMUM LENGTH |
Use the defaults |
DEFAULT ANSWER |
Be creative, keep it clean, we’re all professionals here |
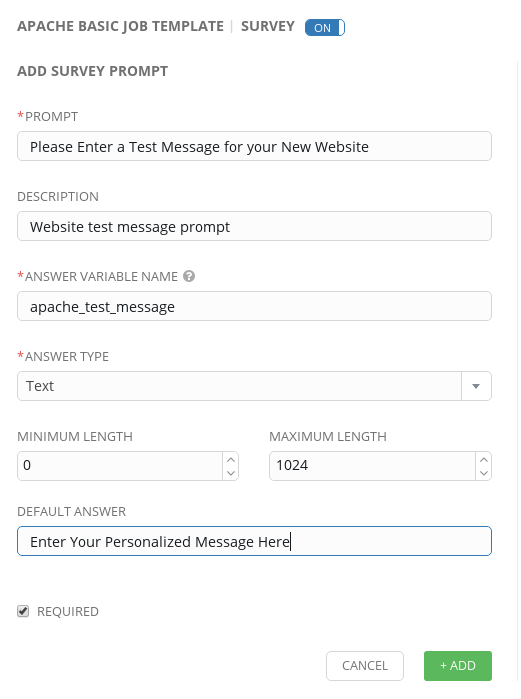
Step 6: Add the survey input
Select ADD ![]()
Step 7: Save
Select SAVE ![]()
Step 8: Save at the main page
Back on the main Job Template page, select SAVE ![]() again.
again.
Section 2: Running a job template
Now that you’ve successfully creating your Job Template, you are ready to launch it. You will be redirected to a job screen, which refreshes in real-time and displays the status of the job.
Step 1: Select the Template tab
Select TEMPLATES
| Alternatively, if you haven’t navigated away from the job templates creation page, you can scroll down to see all existing job templates |
Step 2: Access Apache Basic Job Template
Click on the rocketship icon ![]() for the Apache Basic Job Template
for the Apache Basic Job Template
Step 3: Enter test message
When prompted, enter your desired test message
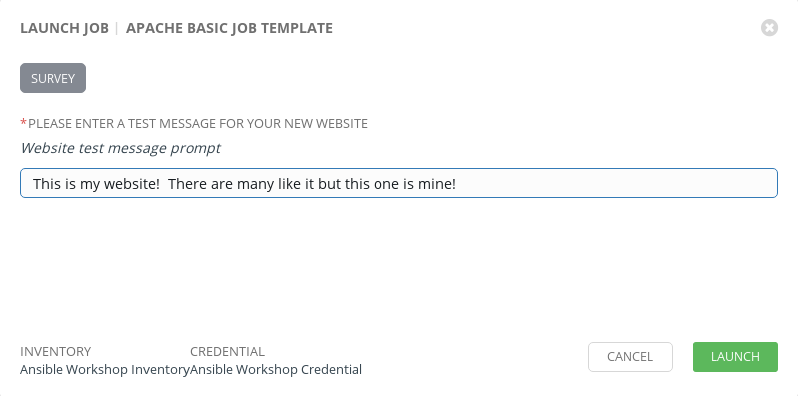
Step 4:
Select LAUNCH ![]()
Step 5: Launch the job
Sit back, watch the magic happen
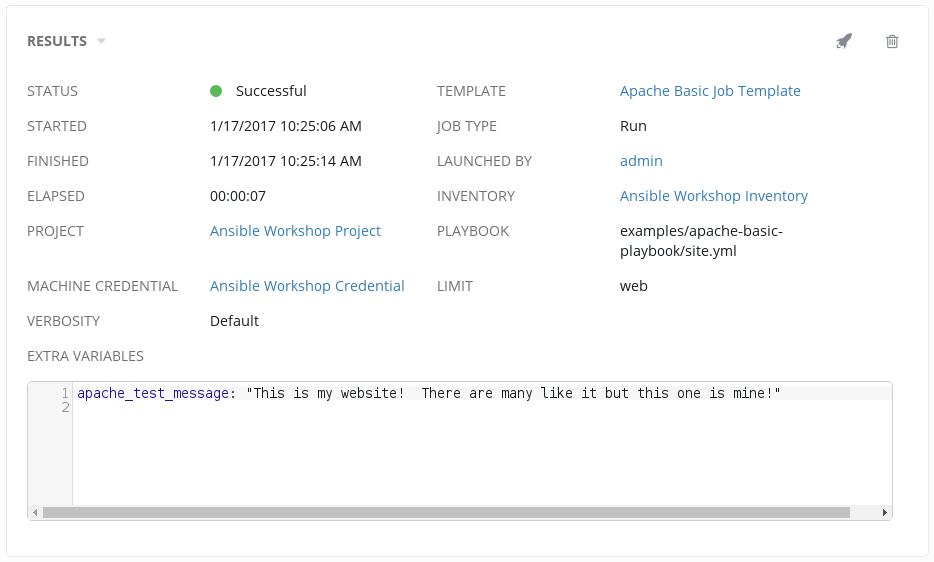
One of the first things you will notice is the summary section. This gives you details about your job such as who launched it, what playbook it’s running, what the status is, i.e. pending, running, or complete.
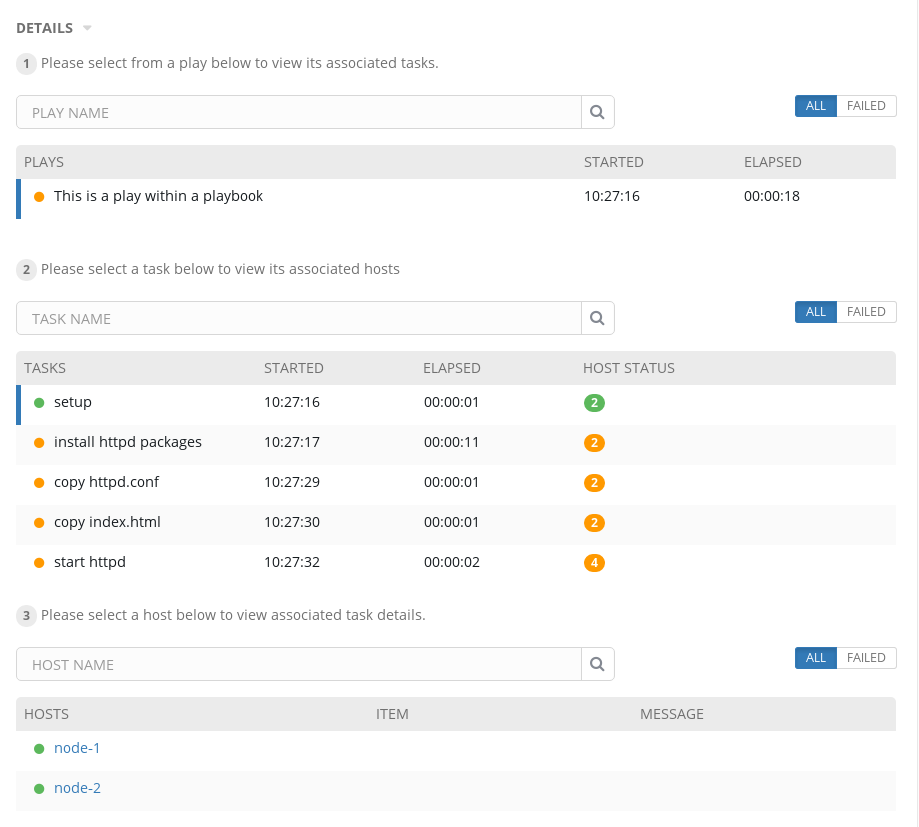
Scroll down and view details on the play and each task in the playbook.
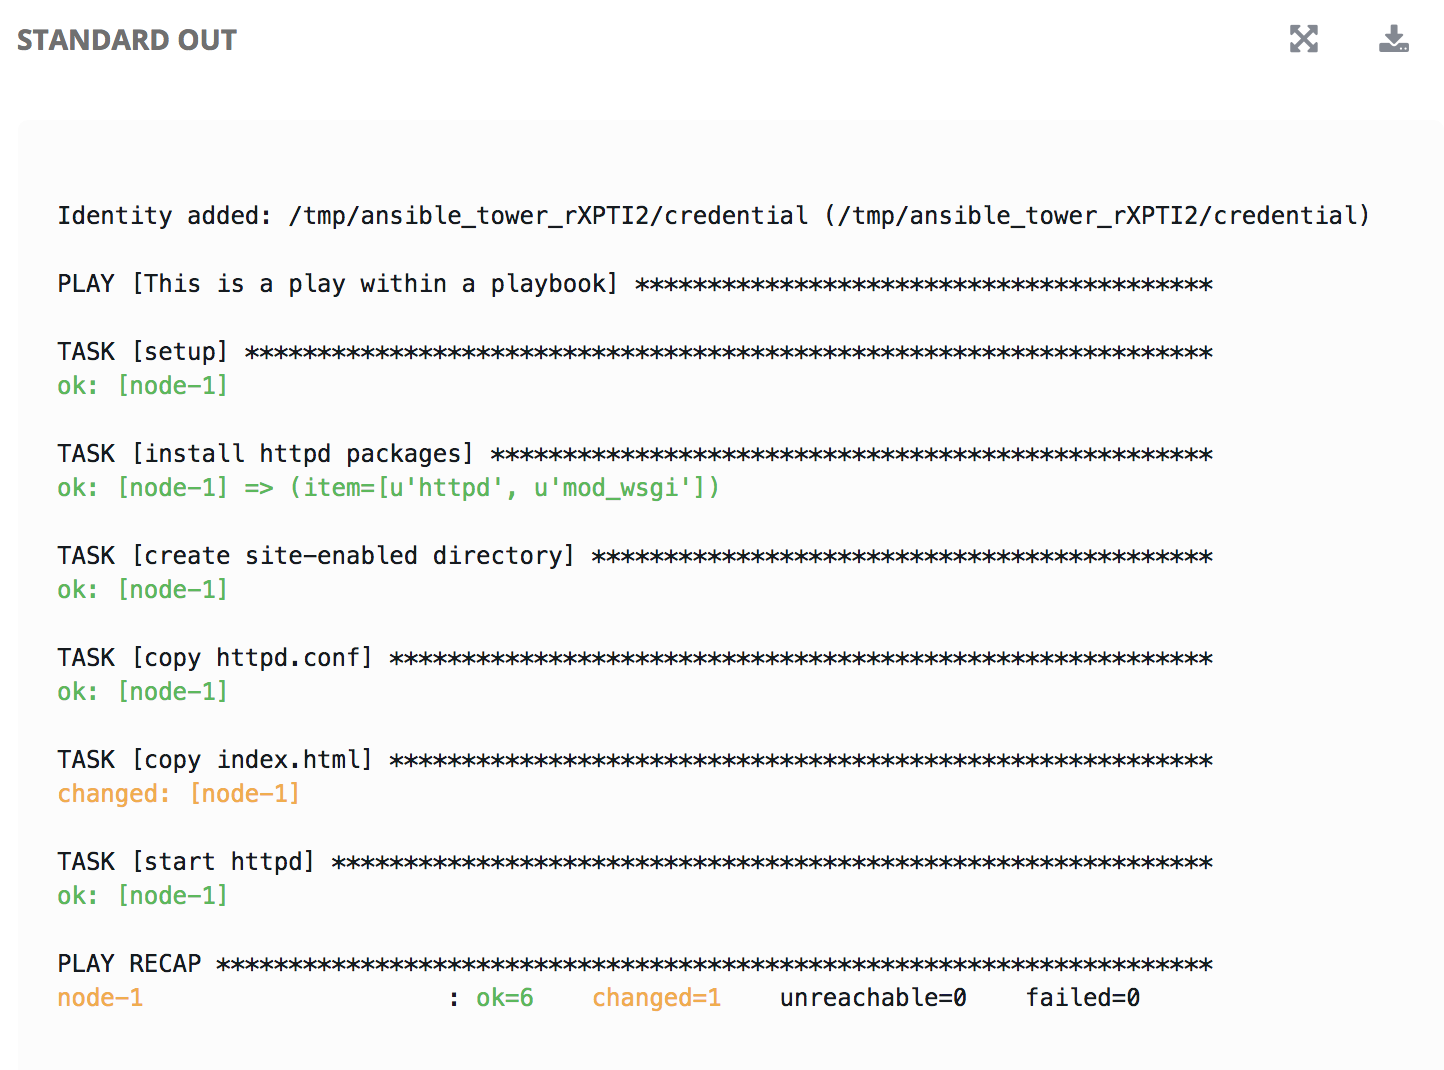
To the right, you can view standard output; the same way you could if you were running Ansible Core from the command line.
Step 6: View the new website
Once your job is successful, navigate to your new website, where workshopname is the name of your workshop, and # is your student number:
http://example-node0.example.redhatgov.ioIf all went well, you should see something like this, but with your own custom message:

End Result
At this point in the workshop, you’ve experienced the core functionality of Ansible Tower. But wait…there’s more! You’ve just begun to explore the possibilities of Ansible Core and Tower. Take a look at the resources page in this guide, to explore some more features.
Workshop Details
|
|
|
|
| Domain: |

|
|
| Workshop Name: | ||
| Region: | ||
| User ID: |